I never knew you could use camera raw 5.0 for jpeg's and tiff files until now. Here's a quick tutorial on how to setup preferences to use jpegs and tiff files in order to open up the camera raw 5.0 interface in photoshop CS3 and CS4. I'm not sure if this works in other photoshop versions. The tutorial below has been carried out in CS4.
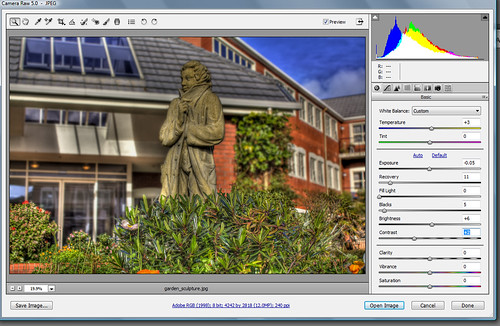
Firstly, for those who don't know what camera raw 5.0 is: It's pretty much an interface which opens up your RAW files to enable you to change and play with various sliders as shown in the image above. Sliders include functions such as exposure, recovery, backlight, etc. Photoshop has other functions such as Levels and Curves for Jpegs and Tiff files but using the camera raw interface, it may be easier to touchup some of those photos that came out under or over exposed.
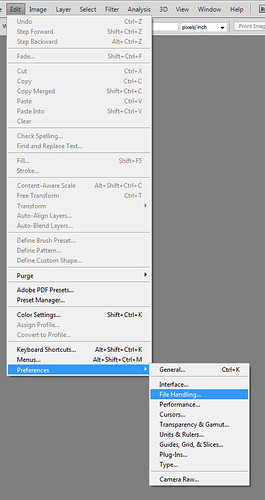
Step 1:
Click on the EDIT menu and go down to preferences and than to File Handling as shown below:
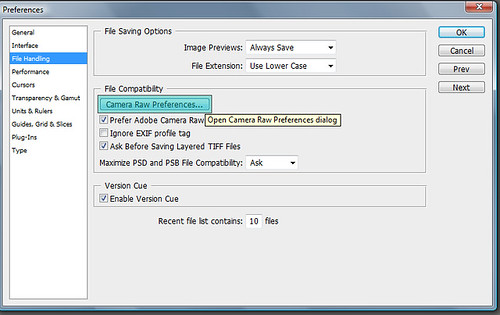
Step 2:
Preferences dialogue box will appear. Click on the "Camera Raw Peferences..." button as shown below:
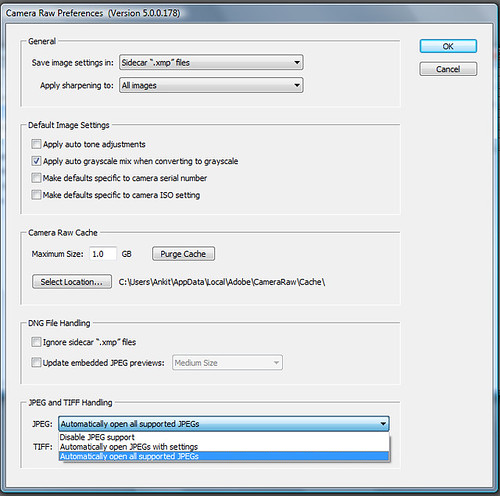
Step 3:
Change the option for JPEG and TIFF handling to: "Automatically open all supported Jpegs" and click OK as shown below:
And that's all you have to do. Now when you open up a JPEG the camera raw 5.0 interface will open and you can quickly change the exposure, backlight and all the rest of the functions available and save your image. No need to play around with curves and levels.

No comments:
Post a Comment